Set up CloudVision360
The three Get started steps - connect Azure, AWS or Google Cloud read-only, let the first scan run, and review your Fix first plan.
Online version, always current: https://cloudone.tech/docs/guides/set-up-cloudvision360/
CloudVision360 finds security, compliance and cost problems across your clouds. A new organization opens on a Get started card with three steps; each one ticks itself off when it’s really done, and its How to link opens its section below. You need the CustomerAdmin or CloudAdmin role.
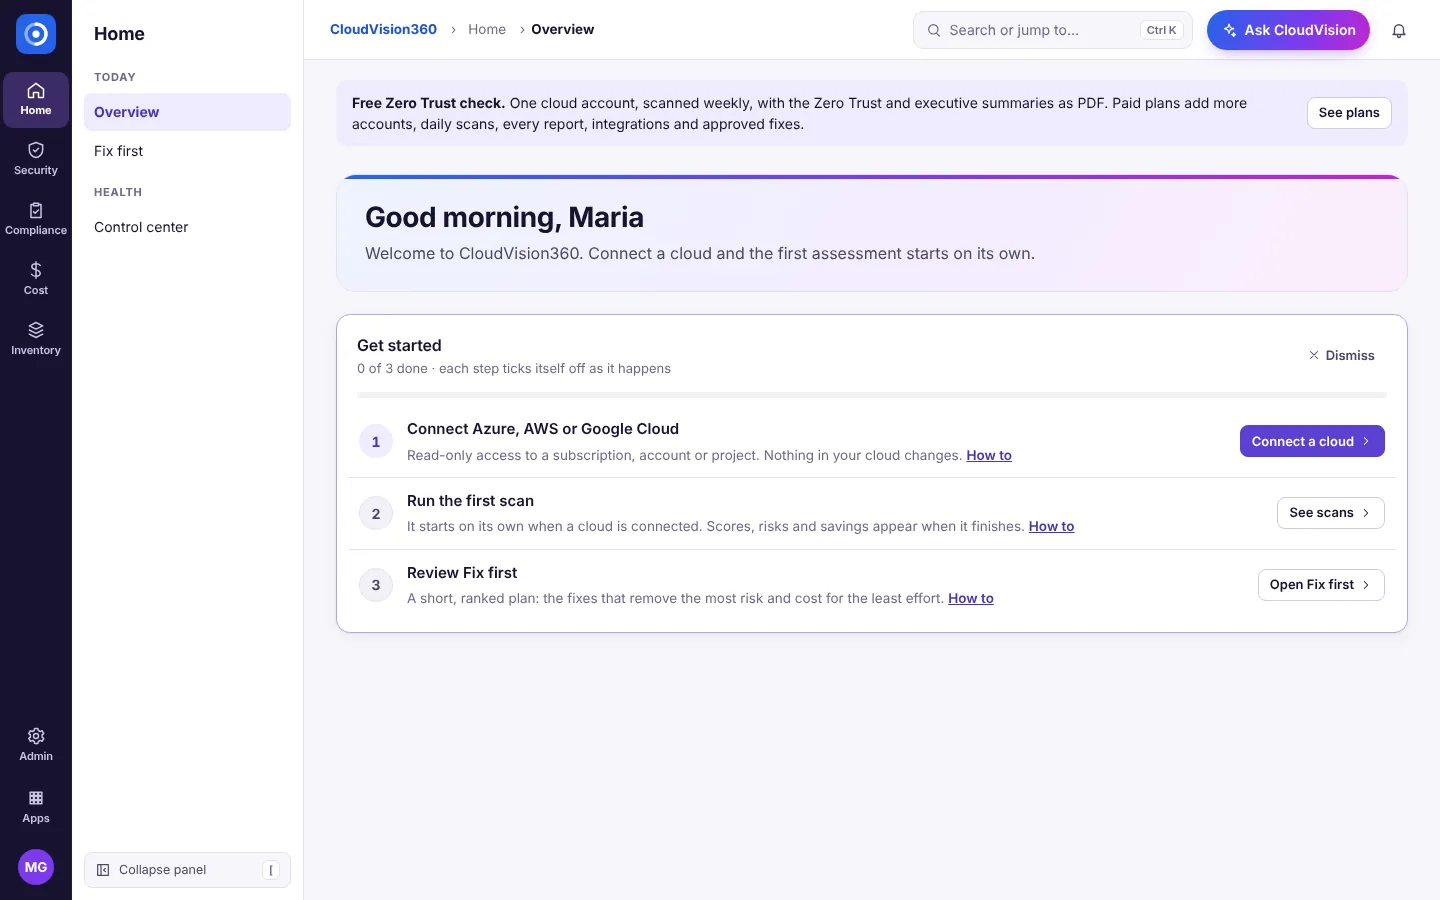
Connect Azure, AWS or Google Cloud
CloudVision360 only reads. It needs a least-privileged reader identity in your cloud; nothing in your cloud changes.
- On the Get started card choose Connect a cloud (or go to Inventory → Cloud connections → Connect a cloud).
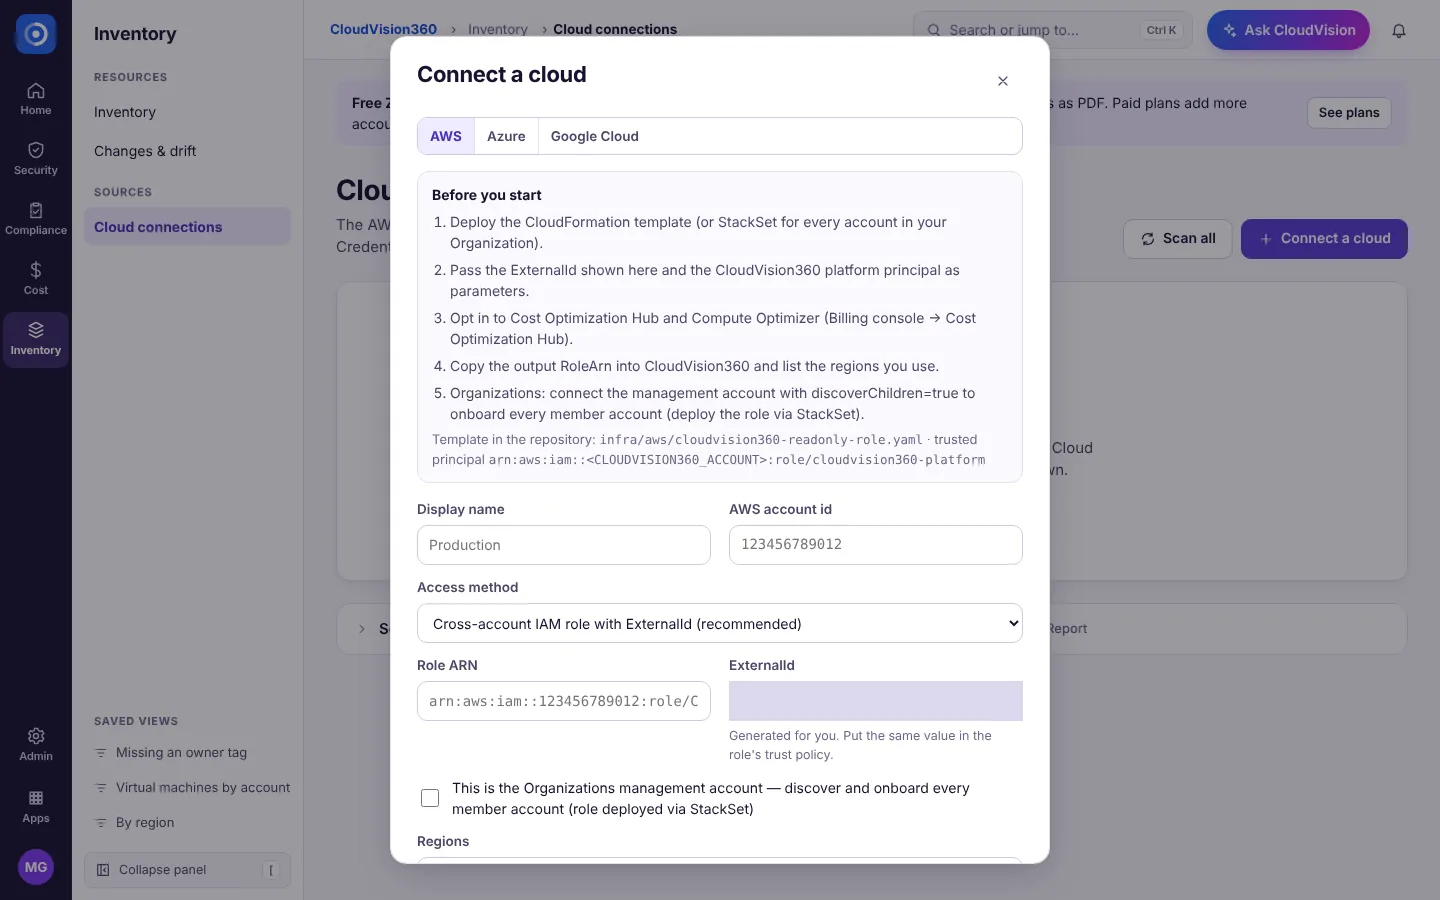
- Pick the tab for your cloud and follow Before you start in the dialog. Each cloud has a ready-made template in the repository that creates the reader identity with exactly the permissions listed.
Amazon Web Services
- Deploy the CloudFormation template (or a StackSet for every account in your AWS Organization), passing the ExternalId shown in the dialog.
- Enter a Display name and your AWS account id, keep Cross-account IAM role with ExternalId (recommended), and paste the Role ARN the stack outputs.
- For an Organizations management account, tick the box to discover and onboard every member account. List the Regions you use and choose Connect.
Microsoft Azure
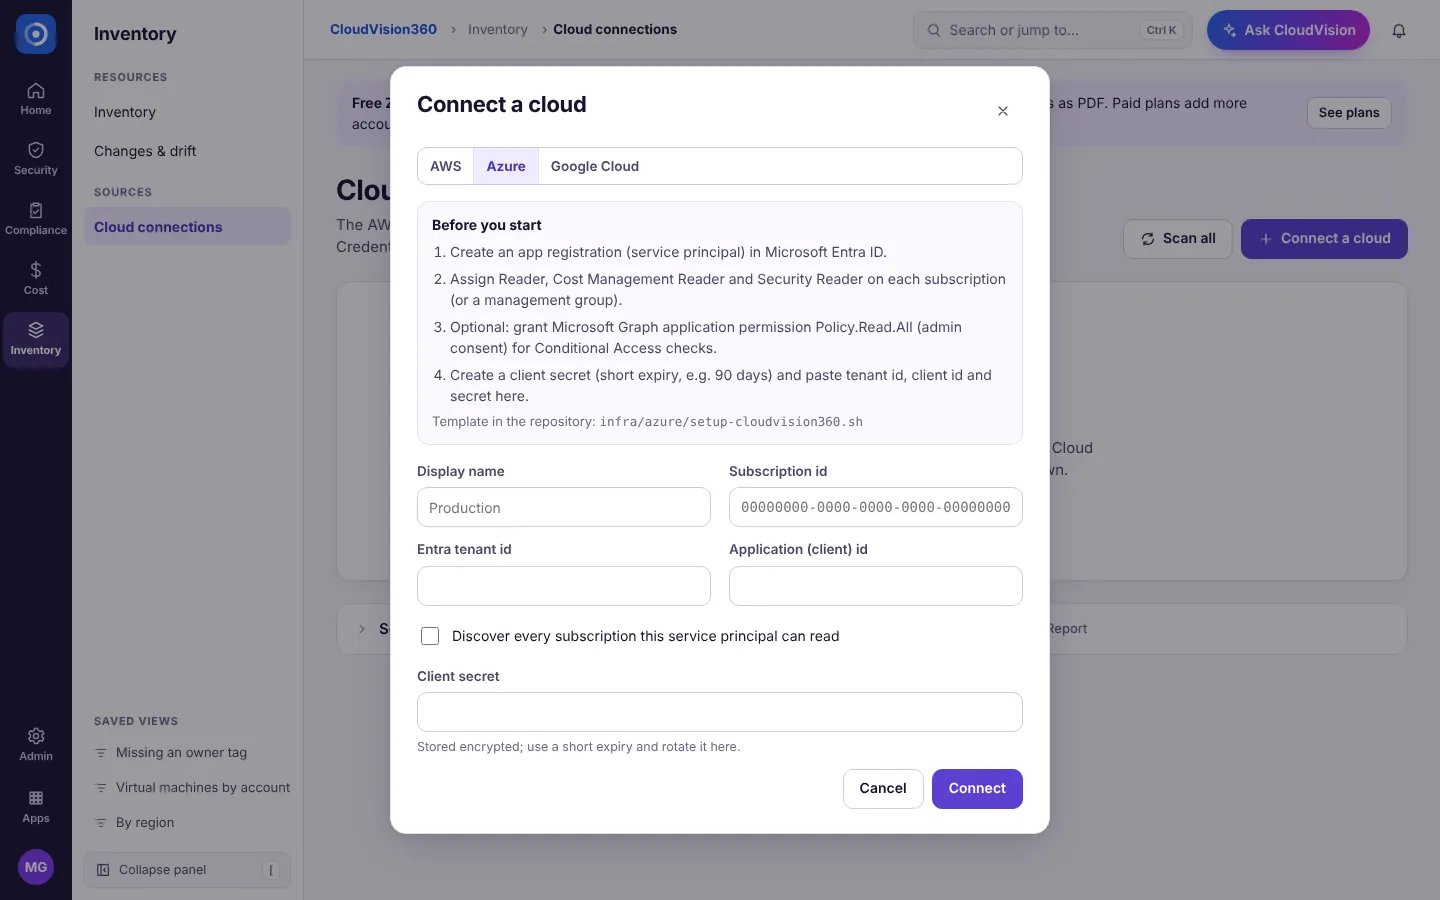
- Create an app registration (service principal) in Microsoft Entra ID and assign it Cost Management Reader and Security Reader on the subscription or management group. The setup script does both.
- Enter a Display name, the Subscription id, the Entra tenant id, the Application (client) id and a Client secret with a short expiry (for example 90 days).
- Tick Discover every subscription this service principal can read to bring them all in, and choose Connect.
Google Cloud
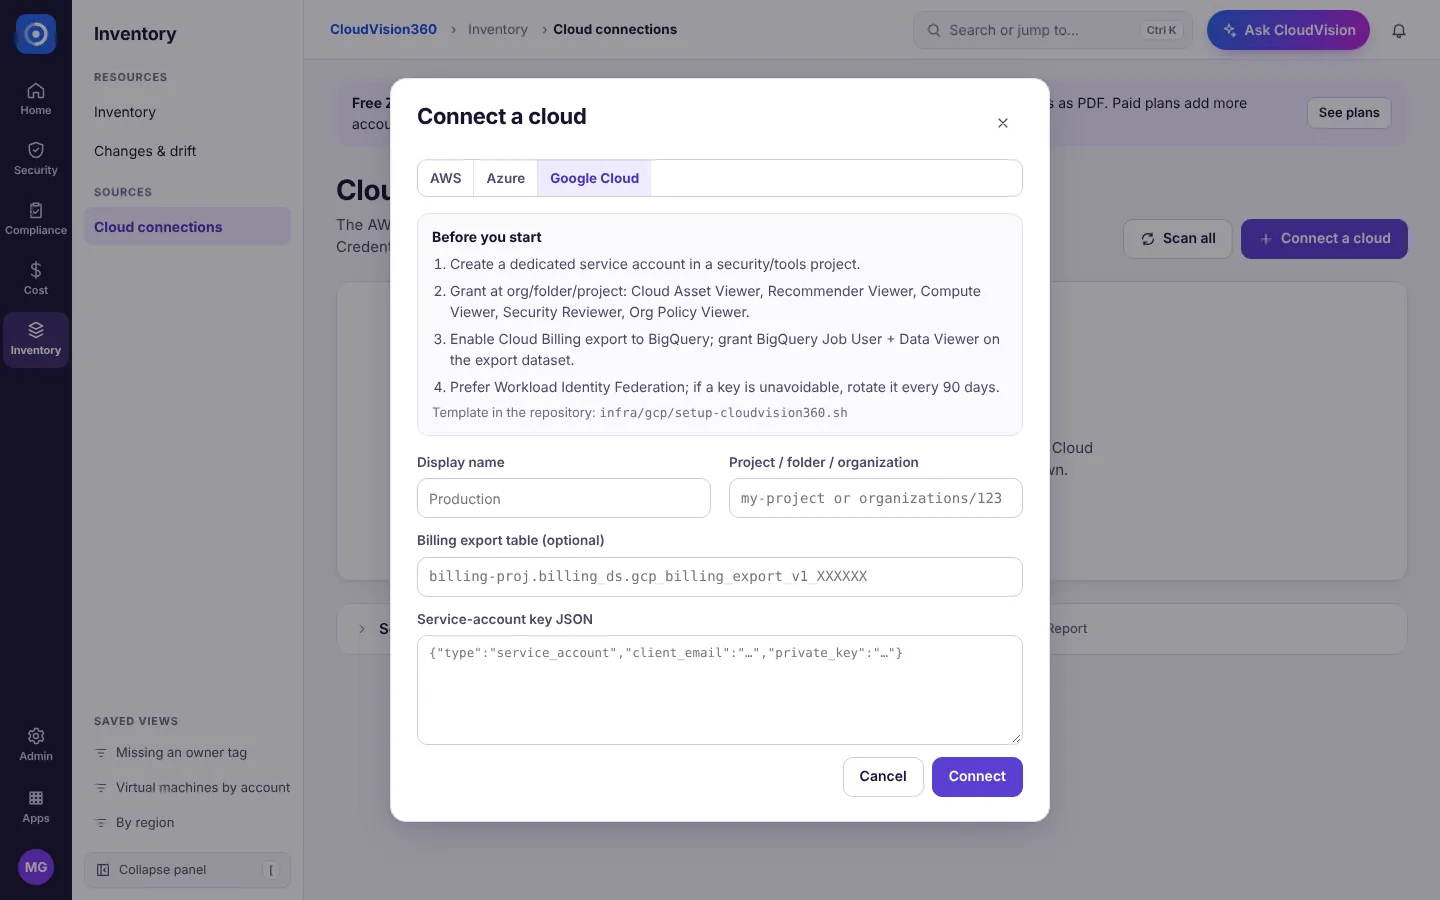
- Create a dedicated service account and grant it the viewer roles listed in the dialog at organization, folder or project level. Turn on the Cloud Billing export to BigQuery if you want cost data.
- Enter a Display name, the Project / folder / organization, optionally the Billing export table, and the Service-account key JSON. Workload Identity Federation is preferred where you can use it.
- Choose Connect.
More detail, including the exact permissions: Connect Azure, Connect AWS, Connect Google Cloud.
Run the first scan
There’s nothing to start: the first scan runs on its own as soon as a cloud is connected, and then on your plan’s schedule.
- Open Inventory → Cloud connections (the Get started card’s See scans button goes there). Each connection shows its access scope, health and Last scan.
- To scan again now, choose Scan on a row or Scan all. Scan history shows each run’s stages: discover, configuration, identity, cost, compliance, risk, recommendations and report.
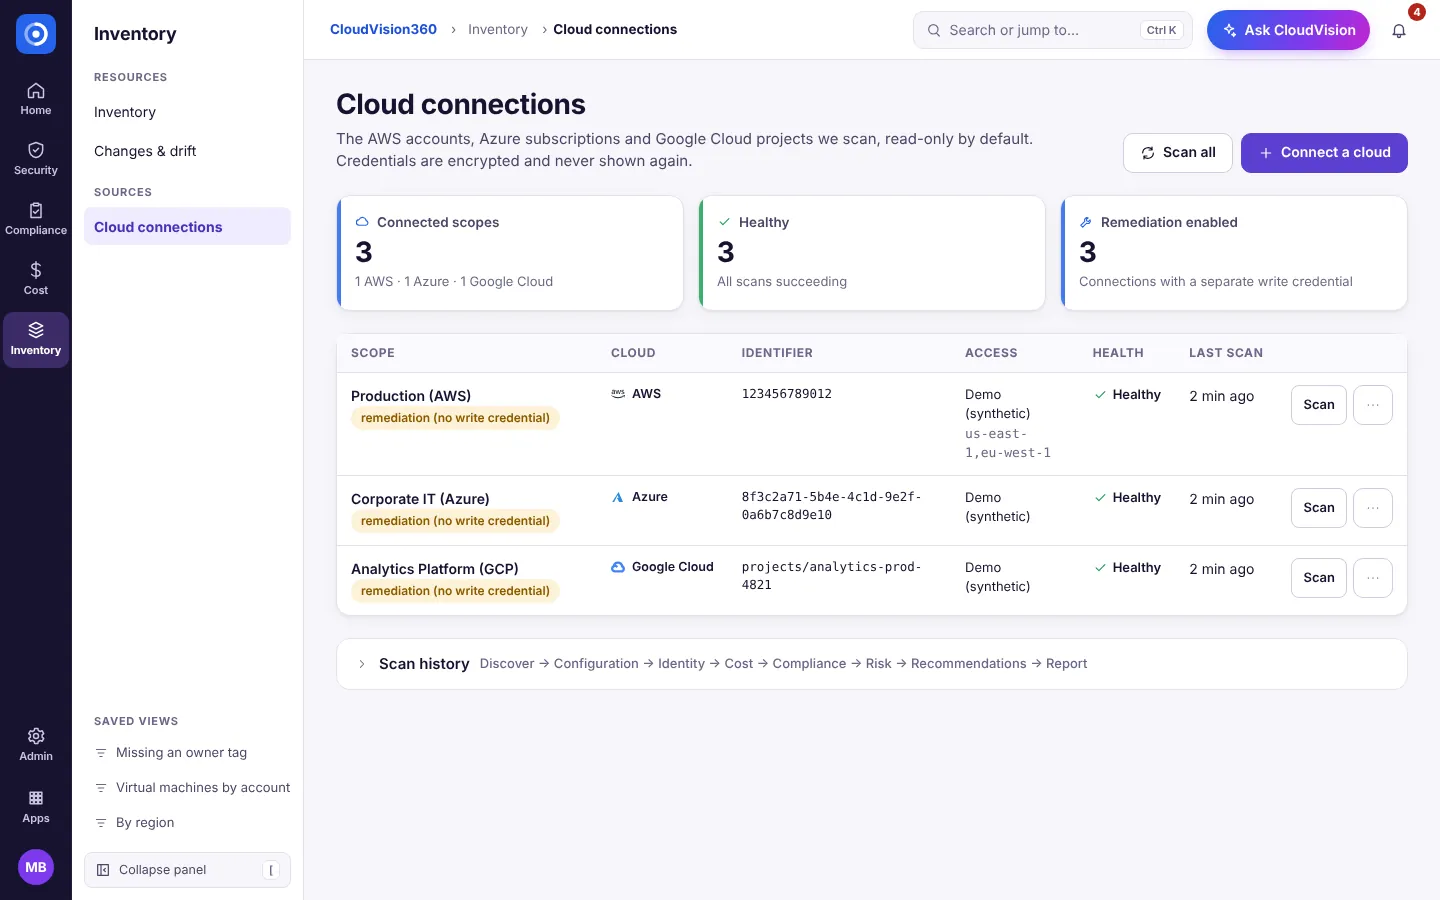
A first scan takes a few minutes. Scores, findings and savings appear across the app when it finishes.
Review Fix first
Fix first is a short, ranked plan: the fixes that remove the most risk and cost for the least effort.
- Open Home → Fix first (or Open Fix first on the card).
- Work from the top. Each action says how much risk it removes or money it saves, the effort, the owner, and which frameworks it helps. Findings or Savings opens the items behind it.
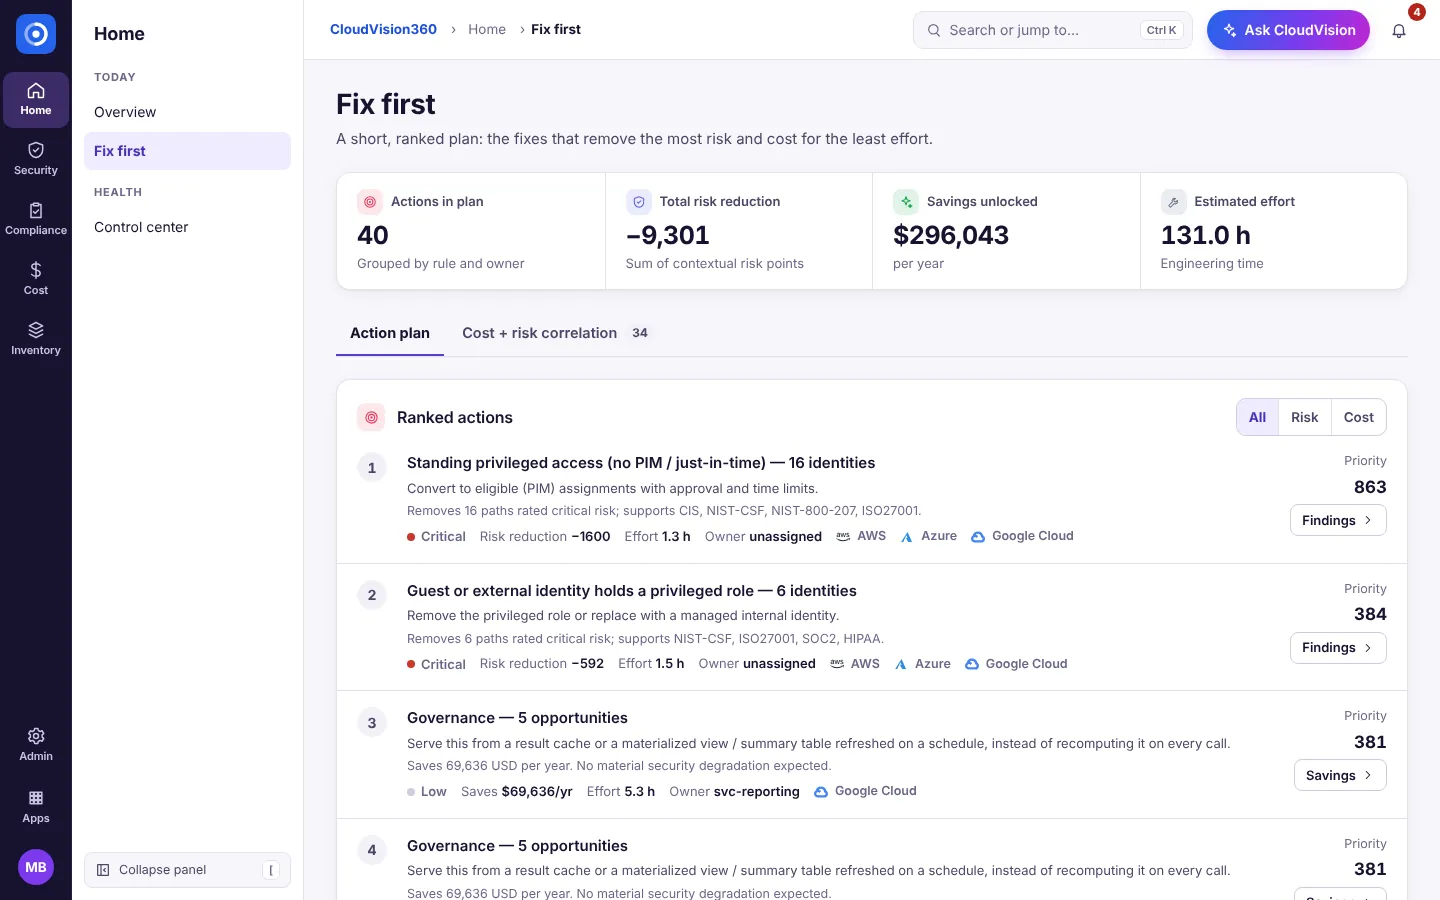
When all three steps are done the card disappears. Day-to-day use is in Use CloudVision360.
Options you can turn on
These options are off or minimal until you set them. Each one has a What does this do? link beside it in the product that explains the same things in brief.
Allow approved fixes on a connection
Scanning uses the read-only credential. To let approved fixes run, open the connection’s menu, choose Remediation access, add a separate write identity and tick Allow approved remediation actions on this connection. Every fix still needs a second person to approve it.
Allow automated remediation
Under Settings, Assessment, the option Allow automated remediation is the organization-wide switch. It only makes fixes available. Each one still needs approval and a write credential on the connection.
Choose compliance frameworks
Under Settings, Assessment, tick the frameworks to check your clouds against, including regional Gulf frameworks, then save. Compliance and new reports include each one you choose.
Send alerts to e-mail, chat or a webhook
Open Notifications and ITSM, then Channels, and choose Add channel. Pick a type, add recipients or a webhook address, choose the events and a minimum severity, and use Test before you turn it on.
Create tickets in Jira or ServiceNow
Under Notifications and ITSM, then ITSM and SIEM, add the integration with a dedicated service account. Set Create tickets automatically for new findings to the lowest severity you want ticketed, or leave it off.
Schedule a report
Under Reports, choose New schedule, pick the report, format and frequency, and add recipients or a channel. Clear Enabled or delete the schedule to stop it.
Break-glass emergency access
Break-glass gives approved people time-limited access when your normal access broker is down. Add a broker in Settings, then use Break-glass to request access. A second person approves it, access expires on its own, and every step is audited. Run drills so people know the process.